How webhooks work in HireHop

HireHop can send a message with data to other apps when certain events are triggered within HireHop.  This message is called a webhook which automatically pushes the relevant data to the required location.

WbhooksWhat is a webhook?

A webhook sends/pushes a message, with data attached to the message, when specific things happen in HireHop (an event).  Webhooks are sent via HTTP (calls a web address) and are a way of pushing data to other applications in real-time.  Webhooks deliver the relevant data to specific applications as it happens, meaning the receiving application gets data immediately after the event happens, which is far more efficient and faster than polling for data changes..

HireHop webhooks can be used to communicate directly with other apps or be sent to a connector like Zapier, that can be made to format the data and make any necessary API calls back to HireHop or to another application.

Setting up a webhook

In HireHop, go to “Settings” then click the “Company settings” tab and the “Webhooks” button at the top of the page.  In the popup window, click on the “New” button and add the URL where the webhook message is to be sent to and select every webhook that you want the URL to respond to.  You can add as many webhooks as you want, but should limit them to only the necessary ones that the specific URL will respond to.

A HireHop webhook will POST data to your URL endpoint as JSON, and will contain the following or similar data.

{
    "time": "2022-03-29 07:50:42",
    "user_id": 1,
    "user_name": "John Smith",
    "user_email": "john@email.com",
    "company_id": 1,
    "export_key": "22u43mrjwe7u",
    "event": "invoice.status.updated",
    "data": { ... },
    "changes": {
        "FIELD_NAME": {
            "from": "old",
            "to": "new"
        }, ...
    }
}

In the above JSON example, the following fields are:

  • time” is the UTC time and date the webhook was sent.
  • user_id” is the ID of the user who caused the event to be triggered.
  • user_name” is their user’s name.
  • company_id” field is the unique number identifier of the company the user works for.
  • export_key” is the value of the export key in company settings which can be used as a security check.
  • event” is the name of the webhook event that was triggered.
  • data” is the data that appertains to the webhook event.
  • changes” are the fields that changed, being what they were to what they got changed to.

HireHop will not wait for a response from the called URL or report an HTTP error from calling it.

Example PHP code for a URL endpoint to capture the webhook data would be:

<?php
	// Read the JSON data
	$postdata = file_get_contents('php://input');
	// Convert JSON data to an object
	$data_str = json_decode($postdata);
?>


Posted in API

HireHop Rest API – Getting Started Guide

HireHop is built on top of an API, meaning anything you see HireHop do, you can also accomplish using the extensive API.  All you need to access the Rest API is a user token applied as a GET or POST to the relevant URL endpoint.

API Tokens

To generate an API token, go to the “Settings” page and select the “Users” tab.  Select or create a user, then while that specific user is selected, click the “Menu” button then the “API token” option to generate a token.  The token will then display and can be copied to the clipboard using the copy button.

The token will become invalid if you change the email or password of the selected user, or you subsequently login to that user.  To prevent this from happening, you should create a dedicated API user, and for security give it the relevant permissions, thus restricting it from anything you will not be using the API for.

For security reasons, you should never use the token in front end JavaScript code, it should only be used server side, as if a hacker obtains the token, they can change and access your data on HireHop, so keep your token a secret.  If your token does get leaked, just change the password of the API user and generate a new token.

Using A Token

A token should be set as a GET or POST parameter that is called “token”.  For example, to load job data for job number 52, HireHop will call the API endpoint:

https://myhirehop.com/php_functions/job_refresh.php?job=52

If you want to call the same endpoint using a token, the URL would be:

https://myhirehop.com/php_functions/job_refresh.php?job=52&token=dqwejk5GVT65909bHHBN7922pq5hxjm%207hmn

Remember that when passing the token via GET (a URL parameter like above), you must encode the token first using a tool like https://meyerweb.com/eric/tools/dencoder.

Posting Data

To create or edit data in HireHop you must use a POST. When posting data, you should set only the fields that you want to change, for example to create or edit a job using the endpoint https://myhirehop.com/php_functions/job_save.php, setting the parameter “job” to “0” or omitting it will create a new job, anything else will edit the relevant job number.  So to edit the company name in job number 52, the post data should be:

{
"job" : 52,
"name" : "New Name",
"token" : "dqwejk5GVT65909bHHBN7922pq5hxjm=-7hmn"
}

API Endpoints

Many API endpoints are documented in the API documentation, with many more to follow.  To establish the endpoint for a task, in the HireHop application, use the browser network console to inspect the network calls and what parameters are set.  An extensive guide to the URL endpoints will be published soon.

Rate Limits

HireHop allows each user 60 connection requests within a 1 minute period.  If there are more than 60, a “Security warning, too many transactions” (327) error is returned.

Posted in API

Broadcast Rental Software – Software for lighting, camera & broadcast rental companies

Of all the rental business sectors, TV and equipment broadcast rental is one of the most challenging, with the most varied demands, workflows and feature requirements. With so many different different lines of stock, with different options for each piece of equipment, early returns, periodic invoicing, sub rental, equipment dispatch on different days, invoicing in multiple currencies, etc, to efficiently manage this huge complexity you need affordable, easy to use, powerful and feature rich broadcast rental software, built for your industry.

Broadcast Rental Software Specific Needs

Broadcast camera rental softwareAt HireHop we don’t want you to change your workflow, as it’s your business and you should run it the way you want to.  This is why there are so many ways to do the same thing in HireHop, as well as the ability to customise it to make it look and work the way you want it to, not the other way round.

HireHop was built with the complexities of broadcast equipment rental in mind. Built with functionality to make your workflow more efficient and cost effective without breaking the bank, thus helping your business run more smoothly.  This gives you more time and money to grow and invest into your business, instead of wasting time on administration or battling with overpriced and limited functionality software.

Camera, Grip and Lighting Rental Software

Broadcast lighting rental softwareWhether a client is renting a small Red Head kit with optional scrims and barn doors, a daylight with header cable and PSU or a Red Dragon with optional lenses and accessories, your staff when processing the rental, need to see what needs to be included and what could be added to help upsell your services.

HireHop will show you when there are shortages, manage sub rentals and cross depot rental, as well as show you availability in real time.

When the warehouse is checking out equipment, you and use barcodes or not, you can even use a mixture of both, with every screen synchronised together in real time.  So when one person checks an item out, every other person can see it on their screen instantaneously.

Software That Empowers Your Broadcast Rental Company

HireHop has the most advanced, yet easy to use document engine in the world, enabling you to produce amazing and professional looking quotes at the click of a mouse.  Create documents that make you stand out from your competitors, as a basic or bad looking quote can severely damage your reputation and how clients perceive you. Prevent the disappointment of losing lucrative rental contracts due to basic quotes, and let HireHop give you that upper hand over your competitors.

With some of the largest companies in the world in various sectors now using HireHop, all switching from their old software, a testimony to how powerful and beneficial HireHop is and how beneficial it can be for you, no matter if you are a large or small company, let HireHop help you streamline your business.

Hire software barcodeBarcodes For Your Rental Software

Some companies barcode their products, others don’t.  HireHop can work with or without barcodes, or even a mixture of both scenarios.  HireHop can even generate barcodes for you, or you can use pre-existing barcodes.  HireHop also works with almost every barcode scanner, albeit on normal barcodes or QR codes, it even works with RFID labels.


Free Broadcast Rental Software

As our ethos is to deliver a product that helps broadcast rental companies like yours, we even offer a free version of HireHop software for small single user companies to help them get off the ground.

Try HireHop today for free or contact us to arrange a free demo.

POS For Equipment Rental Software – Electronic Point of Sale Cash Register For Rentals

Whether you run a tool rental business, a surf shop, tuxedo rental, or bike rental, as a rental business owner, you need a simple point of sale (cash register, POS or ePOS) system that processes rentals from your customer facing rental desk.

POS for rentalsEasy To Use ePOS For Rentals

HireHop gives you a system that even the part time staff can use with minimal training, handling not only rental sales, but also sales of parts and other products. It seamlessly integrates with the rest of HireHop equipment rental software, so that you can handle all aspects of rental inventory management.

HireHop gives you all of this at no extra cost, and being in the cloud means that it can run on practically any device or computer.

Cash Register for Rental Companies With Advanced Features

Rental company softwareSometimes a simple POS interface is just not enough and you need more advanced functionality for some rental contracts.  This is not a problem, as every rental job is available within the HireHop software, giving you the ability to utilise all the additional advanced features that HireHop has to offer.

With an easy to use interface giving you maximum functionality, HireHop allows rental companies with specific needs to reach their maximum potential without having to change their workflow.

The HireHop cash register system is designed with you in mind, allowing you to access all of your jobs within an easy-to-use interface. This simple-to-use interface lets you process jobs easily, quickly and efficiently.


Start using HireHop today for free or contact us for a free demonstration to see how much HireHop can benefit your rental company.

Cross Domain Fonts CORS – CSS font-face not loading

Many users have created some amazing documents for use in HireHop, utilizing HTML5, JavaScript and CSS functionality.  For these documents users sometimes need a special font that they store on their server, however, sometimes the font doesn’t seem to work in the HireHop document.  The reason for this is because of Cross-Origin Resource Sharing (CORS) restrictions in browsers.

Fonts Not Loading in Documents & Web Pages

Most web browsers do not allow cross-domain requests, this is because of the same origin security policy. The result is that sometimes when using web-fonts from another domain, this can cause errors and the font does not load in the web page (or HireHop documents). Basically, for security reasons, some files are being “flagged” as not being allowed to be used across different domains by the server that hosts them, so the following typical code might not seem to work:

<style type="text/css">
@font-face {
    font-family: "OpenSans";
    src: url("https://my_server.com/fonts/OpenSans.woff2") format("woff2");
}
html, body{
    font: normal 16px OpenSans, sans-serif;
}
</style>

The Solution

To fix cross-origin restrictions for your fonts, the response from remote server that hosts the font files must include the Access-Control-Allow-Origin header in the font file.

If you’re using font services like Typekit or Google Fonts, or maybe content delivery networks like BootstrapCDN, CdnJS or JsDelivr to load your prefered fonts, you don’t need to do anything, because the Access-Control-Allow-Origin header is already sent in their response header.

Apache

To configure an Apache web server, put the following code into the httpd.conf or .htaccess file.

  1. Add the mime type headers on Apache:
    AddType application/vnd.ms-fontobject    .eot
    AddType application/x-font-opentype      .otf
    AddType image/svg+xml                    .svg
    AddType application/x-font-ttf           .ttf
    AddType application/font-woff            .woff
    AddType application/font-woff2           .woff2
    
  2. Enable cross-origin resource sharing (CORS) on Apache for the mime types:
    <IfModule mod_headers.c>
      <FilesMatch ".(eot|otf|svg|ttf|woff|woff2?)$">
        Header set Access-Control-Allow-Origin "*"
      </FilesMatch>
    </IfModule>
    

NGINX

To configure an NGINX web server, put the following code into the /etc/nginx/nginx.conf or your custom /etc/nginx/conf.d/custom.conf file.

  1. Add the mime type headers on NGINX:
    application/vnd.ms-fontobject    eot;
    application/x-font-opentype      otf;
    image/svg+xml                    svg;
    application/x-font-ttf           ttf;
    application/font-woff            woff;
    application/font-woff2           woff2;
    
  2. Enable cross-origin resource sharing (CORS) on NGINX for the mime types:
    location ~* .(eot|otf|svg|ttf|woff|woff2)$ {
        add_header Access-Control-Allow-Origin *;
    }
    

IIS

To configure the Microsoft IIS, add the following the code to the web.config system.webServer block.

  • Enable cross-origin resource sharing (CORS) on IIS
    <system.webServer>
      <httpProtocol>
        <customHeaders>
          <add name="access-control-allow-origin" value="*" />
          <add name="access-control-allow-headers" value="content-type" />
        </customHeaders>
      </httpProtocol>
    </system.webServer>
    

PHP

If you can’t change the server settings, you can always use PHP to deliver the font file.

  • Use a server script file rather than a physical font file
    <style type="text/css">
    @font-face {
        font-family: 'OpenSans';
        src: url('https://my_server.com/fonts/OpenSans.php') format('woff2');
    }
    html, body{
        font: normal 16px OpenSans, sans-serif;
    }
    </style>
    
  • How to fix cross-domain @font-face issues with PHP
    <?php
    // fonts.php
    header('Access-Control-Allow-Origin: *');
    header('Content-Type: application/font-woff2');
    echo @file_get_contents('/fonts/OpenSans.woff2');
    ?>
    
Posted in API

New Updates and Features – Summer 2020


We strive to improve our cloud based hire business software by actively listening to our users and implementing the features that they need. We have worked tirelessly to bring you new features and functionality based on users feedback and needs, that many of our users have been beta testing over the past few months. We look forward to continuing our journey together to make the best software even better!


ACCOUNTS UPDATES

  • Set up multiple accounts packages linked to different depots or virtual depots – As many hire companies operate more than one company in the same depot, or different companies at different depots, and sometimes using different accounting software for different companies or sharing some but not others, etc., HireHop has developed a simple new and unique feature to handle this complex problem.  HireHop has the ability to assign different accounting software company accounts, from Sage 50, Sage Business Cloud, QuickBooks and Xero (with more to come), to different depots or virtual depots.
  • New and improved integrations with Xero and Quickbooks, including live sync functionality – this means that as soon as an invoice, PO or credit note is approved in HireHop it will appear in your accounts package, and payments will come back into HireHop seamlessly. View setup pages for Xero here, and Quickbooks here.
  • New accounts integrations to Sage 50 and Sage Business Cloud.
  • Batch/bulk invoicing that can be forward or backdated. Available from Home-Management-Batch Invoicing, simply choose the jobs you wish to invoice and set the invoice status (draft, awaiting approval or approved) and the date you wish to invoice up-to. Once issued you can even email the invoices off to all the relevant clients at the click of a button.
  • Early returns – a new option has been added to Jobs to ‘Allow early returns’. If this option is selected, an item will be charged up-to the date that it is checked in. For example if you have 2 items on a job for 2 weeks but Item 1 was returned after 1 week, with allow early returns enabled Item 1 would be charged for 1 week and Item 2 for the full 2 weeks. If early returns is disabled, both items are charged for the full 2 weeks.
  • Part invoicing up-to a date on normal and open-ended hires. When creating an invoice simply choose the date you want the invoice to charge up-to. The date can be the current date or in the past or future.
  • Invoices, credit notes and purchase orders can have prefixes, and these prefixes can differ for each accounting package.
  • US sales tax supportHireHop now has the ability to better utilise US sales tax, setting each depot (or virtual depot) to a default rate, with the ability to change that rate or manually enter the tax amount charged.
  • Ledger correction payments when syncing.

GENERAL UPDATES

  • Supplying items can now change charging structure – so if an item is listed as daily, in the supplying list you can change this to a weekly rate for only that item in the supplying list.
  • Locking Jobs – jobs can now be locked in 2 ways to prevent certain job changes. No changes can be made, even in Admin mode, unless the job is unlocked.
    • Manager lock – The manager of the job or an Administrator can unlock the job.
    • Admin Lock – Only the Administrator can unlock the job.
  • Documents available in all supported Languages – If you have customers who speak one of HireHop’s supported languages, you can simply add documents in that language to send to them in their native language.  We also tweaked and did a general cleanup of all template documents, setting page headers, etc.
  • New languages availableHireHop is now available in English, Spanish, French, Japanese, Portuguese, Norwegian, Swedish and Slovak.
  • Extra depot limiting permissions – Users can be set permissions to only see jobs, projects, stock, consumables, packages, services and contacts assigned to their own depot only.  There are also permissions to stop users changing their depot and the depots of jobs, stock, etc.
  • Customer signature capture document – The new ‘Signature Receipt’ document allows users to open the document on any device to be signed by the recipient. Once signed pressing save saves a copy of the document and signature to the files tab of the job, capturing the exact time it was signed and the HireHop user who took the signature. If you don’t see this on your list of documents Printable from a job, it can be added from Home-Settings-Documents-New.
  • Users can add a photo and telephone number for themselves in Settings – Documents can also incorporate these extra fields.
  • Report updates and fixes, including a revamped Invoices to be Exported report.
  • Integration with VehoCheck.
  • Custom fields available on invoices, credit notes and purchase orders.
  • Speed improvements and other bug fixes.

Sage Equipment Rental Software – Sage 50 Hire Company & Accounting Software

Sage 50 Equipment Rental Software
HireHop can synchronize your invoices, payments, purchase orders, credit notes and contacts with Sage 50 (or Sage 50 Cloud) instantly and automatically without the need for user intervention.
Utilise the power and extensive functionality of HireHop Equipment Rental Software and its seamless integration with Sage 50 Accounting, with simplicity and ease, from any device, such as a PC, Mac, tablet or phone, enabling you stay in control of your finances and hires from anywhere and at any time.

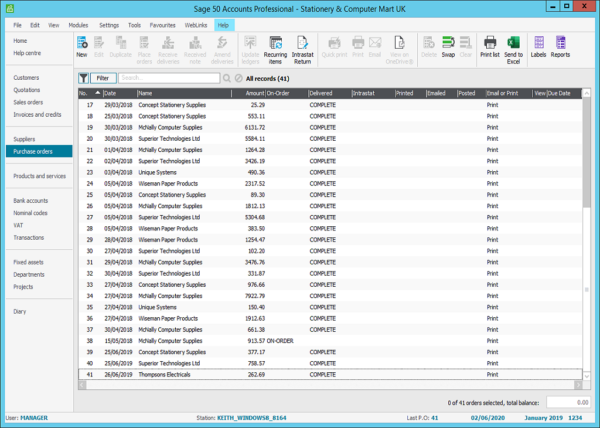
Sage 50 screenshot
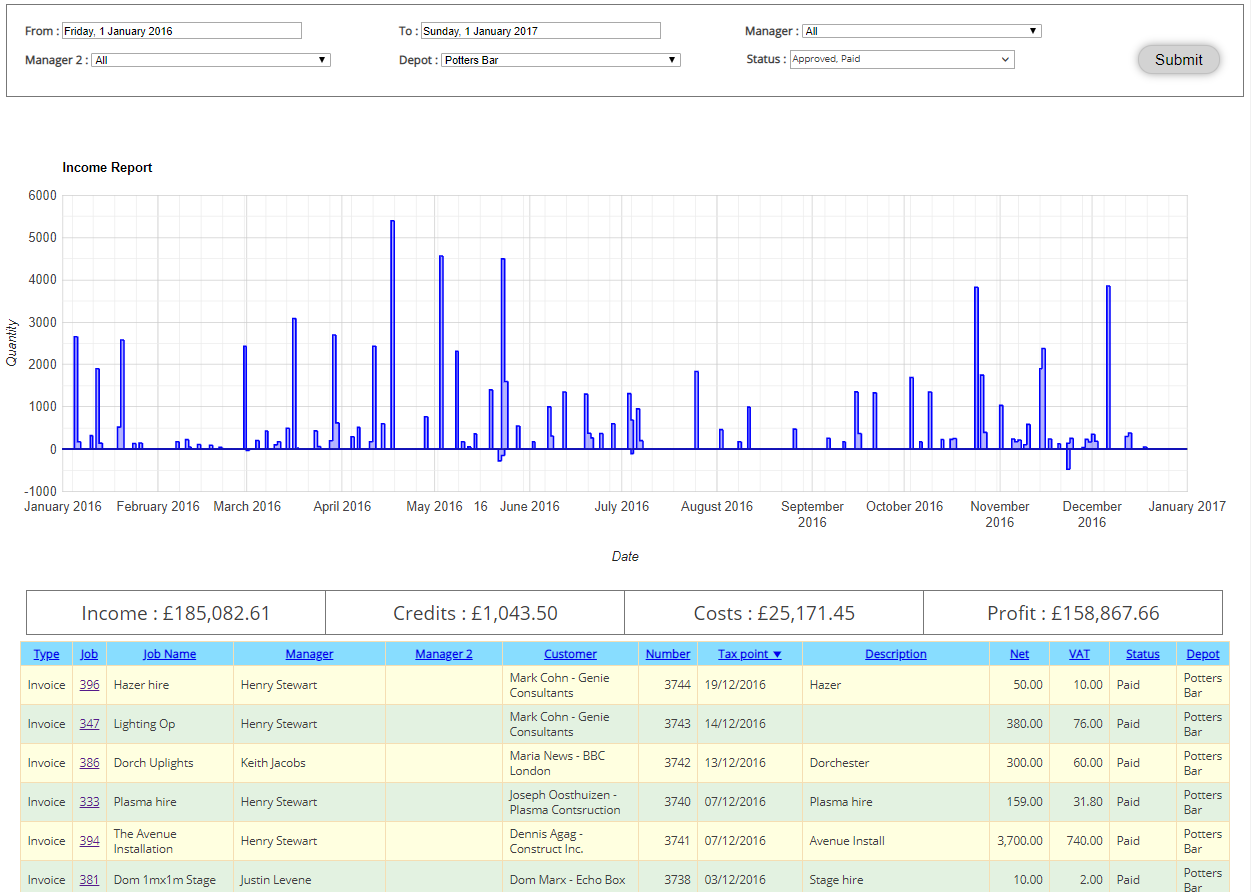
Invoices accounting report


Sage+ HireHop App Together Syncplayer_video_id=”wOh81TQXWog”;

HireHop & Sage 50 Work Together For You

  • Invoices and purchase orders instantly & seamlessly synchronized
  • Multiple Sage 50 companies can be used within HireHop
  • Payments and credits created in HireHop sent instantly to Sage 50
  • Customers & suppliers in Sage 50 can be imported into HireHop
  • Let HireHop automatically update Sage50 or choose to review before a batch update
  • New customers & suppliers created in HireHop are automatically sent to Sage 50
  • Seamless automatic integration as Sage 50 & HireHop work as one.
  • Synchronization is live and instant.

Sage + hirehop

HireHop and Sage 50 Integration

Invoices
Invoices created in HireHop are automatically & instantly sent to Sage 50 behind the scenes with no need for user intervention.
Payments & Credits
Payments and credit notes can be entered into HireHop which it then instantly sends to Sage, as they both automatically communicate with each other.
Purchase Orders
Purchase orders created in HireHop are effortlessly sent to Sage so that you can match purchase invoices to them to help prevent being overcharged.
Contacts
Import only necessary customers and suppliers from Sage. HireHop will automatically send new ones used in invoices and purchase orders to Sage.


About Sage 50 and Sage 50 Cloud

Sage 50 screenshot x 2Sage 50 is world-leading accounting software, perfectly tailored for your business.

  • Manage cash flow and invoicing
    See how much you are owed, manage late payments and even schedule payments, all done with live feeds from your bank.
  • Reporting and insights
    Use the Sage 50’s simple in-depth reporting features with the ability to create custom reports to help you with analysis for smarter business decisions.
  • Get paid on time
    Get paid faster by utilising Direct Debit integration from GoCardless or allow customers to pay invoices by clicking “Pay now” on invoices that enables instant PayPal, Stripe or Sage Pay payments.
  • Reconcile in seconds
    Sage imports your bank transactions via a live feed directly from your bank, keeping you up to date.


Easily Connect HireHop Rental Software and Sage 50

  1. Add a new accounts package in HireHop settings, selecting Sage 50 as the package type.
  2. Synchronize to import bank accounts, nominal codes, tax codes and contacts from Sage 50
  3. Assign the new Sage 50 connection to the appropriate depots and you are ready to go.

How To Setup HireHop With QuickBooks – HireHop Equipment Rental Software + QuickBooks

QuickBooks Equipment Rental SoftwareHow Do HireHop and QuickBooks Integrate?

HireHop can produce your invoices, credit notes, payments and purchase orders.  HireHop also has an address book that contains customers and suppliers, as well as jobs where the customer is unique and not in the address book.  HireHop also keeps track of what has been paid and credited against invoices, as well as the balance of a customer’s account.

QuickBooks needs these invoices, credit notes, payments, purchases orders and contacts created in HireHop for bookkeeping purposes. With our integration working seamlessly behind the scenes, HireHop tells QuickBooks when they are created or updated so you don’t have to. In turn, HireHop needs to know what payments or credits have been applied in QuickBooks so that it can register invoices as being paid or not.

What Data Does HireHop Send To QuickBooks?

There are two modes to synchronize data between HireHop and QuickBooks – being live or buffered:

  • In live mode, as soon as you create or edit an invoice, credit note, payment, or purchase order, it is immediately sent to QuickBooks.
  • In buffered mode they are all kept in a buffer until such time you which to synchronize data between HireHop and QuickBooks.  Any invoice, credit note, purchase order or payment that fails to sync with QuickBooks in Live Mode will automatically be put into the buffer for a manual sync.  All buffered invoices and credits can be viewed in the Invoices to be Exported report.

HireHop invoices are sent to QuickBooks once the status has been changed to Approved or above.  If an Approved invoice is edited, it is re-sent to be updated in QuickBooks.  The same goes for Purchase Orders, Credit Notes and Payments.

All new contacts used in invoices and purchase orders are automatically sent to QuickBooks from HireHop.

In QuickBooks, an entry in the address book can’t be both a customer and supplier, therefore, as this feature is available in HireHop, when this happens, HireHop will create two entries in the QuickBooks address book, one for the customers address book, and one for the supplier address book.

Once you have synchronized or connected HireHop to QuickBooks, QuickBooks will authorise this connection for 3 months, after which time HireHop will prompt you to reconnect the next time a connection is needed.

What Data Does QuickBooks Send To HireHop?

Contacts are imported from QuickBooks into HireHop in Settings, enabling you to import only the contacts that you need so that your address book doesn’t become cluttered.

When a payment or credit note is applied to an invoice within QuickBooks, they are sent over to HireHop and registered to the corresponding invoice. The invoice status is then automatically marked as having been paid or not.


How To Setup QuickBooks With HireHop

Setup HireHop with QuickBooks

  • In HireHop Settings click the Accounts tab.
  • In the Accounts click the New button on the right of the Accounting Packages table at the bottom of the screen, and a new accounts package window will open.
  • Click the first option that is titled “Integrate with“, and select “QuickBooks“. You can then set prefixes and start numbers for invoices, credit notes and purchase orders. You can also choose to buffer transactions and sync them when you decide, instead of having live and automated updates. Click the Next button to move on.
  • The “Accounts” page enables you to enter nominal codes and banks accounts.  Click the Synchronize button and HireHop will import all bank accounts and nominal codes from your QuickBooks account.  You should delete all the ones you won’t use in HireHop (you can add them back later). There will be one bank account and two nominal codes in bold, these are your defaults that can be changed.  The defaults are the ones selected when you don’t assign a nominal to an item. Once finished, click Next.
  • The next page is your “Tax codes”, again click the Synchronize button and HireHop will import them from QuickBooks.  Again you can edit and change the defaults from the automatically set ones. Once finished, click Next.
  • Lastly is the “Contacts” page. You don’t have to import these, but if you do, you can match ones that are already in HireHop,  import others and delete the ones you won’t use.  Once finished click the Save button.

You will now see QuickBooks in the Accounting Packages table and some red flashing “Assign” buttons.  As HireHop can support multiple accounting packages in the same installation, different ones for individual depots or groups of depots, you have to set which depots use this version of QuickBooks.  Also HireHop has tax and nominal groups, again, these need to be assigned to QuickBooks ones.

  • Click the Assign button next to the “Accounting packages” table, click on the depot and select “QuickBooks” and then click the Save button.  If a depot is not set, it will use the default accounting package, if a virtual depot is not set, it will use the parent depot’s accounting package.
  • Click the Assign button next to the “Nominal groups” table, click on the QuickBooks row and each column to assign a nominal code to a nominal group. Once finished, click the Save button.  Any nominal group not set will resort to the default revenue or expense nominal code.
  • Lastly, click the Assign button next to the “Tax groups” table, click on the depot rows assigned to QuickBooks and click in each column to assign the appropriate Tax codes to the depot, and then click the Save button.

You have now setup QuickBooks and we are ready to go.


Find out more and try QuickBooks Accounting Software for free.

QuickBooks Equipment Rental Software – QuickBooks Online Rental Company & Accounting Software

QuickBooks Equipment Rental SoftwareHireHop effortlessly synchronizes your invoices, payments, purchase orders, credit notes and contacts with QuickBooks Online behind the scenes. Utilise the power and extensive functionality of HireHop Equipment Rental Software and QuickBooks Accounting with simplicity and ease, from any device, such as a PC, Mac, tablet or phone, enabling you stay in control of your finances and hires anywhere and at any time.

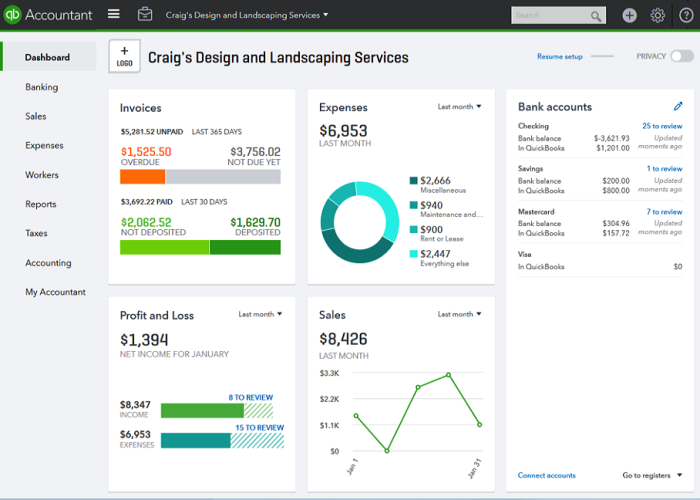
QuickBooks Online screenshot
Invoices accounting report


QuickBooks + HireHop App Together Syncplayer_video_id=”wOh81TQXWog”;

HireHop & QuickBooks Work Together For You

  • Invoices and purchase orders seamlessly synchronised
  • Multiple QuickBooks companies can be used in HireHop
  • Payments and credits created in HireHop sent to QuickBooks
  • Credit notes and payments created in QuickBooks for HireHop invoices sent to HireHop
  • Let HireHop automatically update QuickBooks or choose to batch update
  • New contacts created in HireHop automatically sent to QuickBooks
  • Seamless automatic integration as QuickBooks & HireHop work as one.
  • Synchronization is live and instant.

QuickBooks Online partnerAuthorised QuickBooks Solution Provider certificate

QuickBooks+ hirehop

HireHop and QuickBooks Integration

Invoices
Invoices created in HireHop are automatically sent and updated in QuickBooks behind the scenes with no need for user intervention.
Payments & Credits
Payments and credit notes can be entered into QuickBooks or HireHop, and then each updates the other, as they both automatically communicate with each other.
Purchase Orders
Purchase orders created in HireHop are effortlessly sent to QuickBooks so that you can match purchase invoices to them to help prevent being overcharged.
Contacts
Import only necessary contacts from QuickBooks. HireHop automatically sends new contacts used in invoices and purchase orders to QuickBooks.


QuickBooks featuresAbout QuickBooks

QuickBooks is world-leading online accounting software, perfectly built for your small business.

  • Get a real-time view of your cash-flow
    Real-time information anytime and anywhere on your Mac, PC, tablet or phone. It’s business accounting software that’s simple, smart and intuitive.
  • Run your business on the go
    Use the QuickBooks to reconcile, send invoices, or create expense claims from anywhere.
  • Get paid faster
    Faster payments with online invoicing. Send online invoices to your customers. You can even see if they’ve viewed them.
  • Reconcile in seconds
    QuickBooks imports and categorises your bank transactions.


Easily Connect HireHop Rental Software and QuickBooks

  1. Add a new accounts package in HireHop settings, selecting QuickBooks Online as the package type.
  2. Synchronise to import bank accounts, nominal codes, tax codes and contacts from QuickBooks
  3. Assign QuickBooks to the appropriate depots and you are ready to go.

Detailed help..

How To Setup HireHop With Xero – HireHop Equipment Rental Software + Xero Accounting

Xero Equipment Rental SoftwareHow Do HireHop and Xero Integrate?

HireHop can produce your invoices, credit notes, payments and purchase orders.  HireHop also has an address book that contains customers and suppliers, as well as jobs where the customer is unique and not in the address book.  HireHop also keeps track of what has been paid and credited against invoices, as well as the balance of a customer’s account.

Xero accounting software needs these invoices, credit notes, payments, purchases orders and contacts created in HireHop for bookkeeping purposes. With our integration working seamlessly behind the scenes, HireHop tells Xero when they are created or updated so you don’t have to. In turn, HireHop needs to know what payments or credits have been applied in Xero so that it can register invoices as being paid or not.

What Data Does HireHop Send To Xero?

There are two modes to synchronise data between HireHop and Xero – being live or buffered:

  • In live mode, as soon as you create or edit an invoice, credit note, payment, or purchase order, it is immediately sent to Xero.
  • In buffered mode they are all kept in a buffer until such time you which to synchronise data between HireHop and Xero.  Any invoice, credit note, purchase order or payment that fails to sync with Xero in Live Mode will automatically be put into the buffer for a manual sync.

HireHop invoices are sent to Xero once the status has been changed to Approved or above.  If an Approved invoice is edited, it is re-sent to be updated in Xero.  The same goes for Purchase Orders, Credit Notes and Payments.

All new contacts used in invoices and purchase orders are automatically sent to Xero from HireHop.

What Data Does Xero Send To HireHop?

Contacts are imported from Xero into HireHop in Settings, enabling you to import only the contacts that you need so that your address book doesn’t become cluttered.

When a payment or credit note is applied to an invoice within Xero, they are sent over to HireHop and registered to the corresponding invoice. The invoice status is then automatically marked as having been paid or not.


How To Setup Xero With HireHop

Setup HireHop with Xero

  • In HireHop Settings click the Accounts tab.
  • In the Accounts click the New button on the right of the Accounting Packages table at the bottom of the screen, and a new accounts package window will open.
  • Click the first option that is titled “Integrate with“, and select “Xero“. You can then set prefixes and start numbers for invoices, credit notes and purchase orders. You can also choose to buffer transactions and sync them when you decide, instead of having live and automated updates. Click the Next button to move on.
  • The “Accounts” page enables you to enter nominal codes and banks accounts.  Click the Synchronise button and HireHop will import all bank accounts and nominal codes from your Xero account.  You should delete all the ones you won’t use in HireHop (you can add them back later). There will be one bank account and two nominal codes in bold, these are your defaults that can be changed.  The defaults are the ones selected when you don’t assign a nominal to an item. Once finished, click Next.
  • The next page is your “Tax codes”, again click the Synchronise button and HireHop will import them from Xero.  Again you can edit and change the defaults from the automatically set ones. Once finished, click Next.
  • Lastly is the “Contacts” page. You don’t have to import these, but if you do, you can match ones that are already in HireHop,  import others and delete the ones you won’t use.  Once finished click the Save button.

You will now see Xero in the Accounting Packages table and some red flashing “Assign” buttons.  As HireHop can support multiple accounting packages in the same installation, different ones for individual depots or groups of depots, you have to set which depots use this version of Xero.  Also HireHop has tax and nominal groups, again, these need to be assigned to Xero ones.

  • Click the Assign button next to the “Accounting packages” table, click on the depot and select “Xero” and then click the Save button.  If a depot is not set, it will use the default accounting package, if a virtual depot is not set, it will use the parent depot’s accounting package.
  • Click the Assign button next to the “Nominal groups” table, click on the Xero row and each column to assign a nominal code to a nominal group. Once finished, click the Save button.  Any nominal group not set will resort to the default revenue or expense nominal code.
  • Lastly, click the Assign button next to the “Tax groups” table, click on the depot rows assigned to Xero and click in each column to assign the appropriate Tax codes to the depot, and then click the Save button.

You have now setup Xero and we are ready to go.


Find out more and try Xero Accounting Software for free.